How to Install and Activate ArcGIS Pro?
In this guide, you will find detailed instructions on how to correctly prepare the program files, complete the installation, and configure the license.
Phase 1: File Preparation
-
Extract the downloaded archive: Right-click the file and select Extract all (see Fig. 1).
-
Choose a location on your computer and click Extract.
-
Open the extracted folder and run the installation file (see Fig. 2).
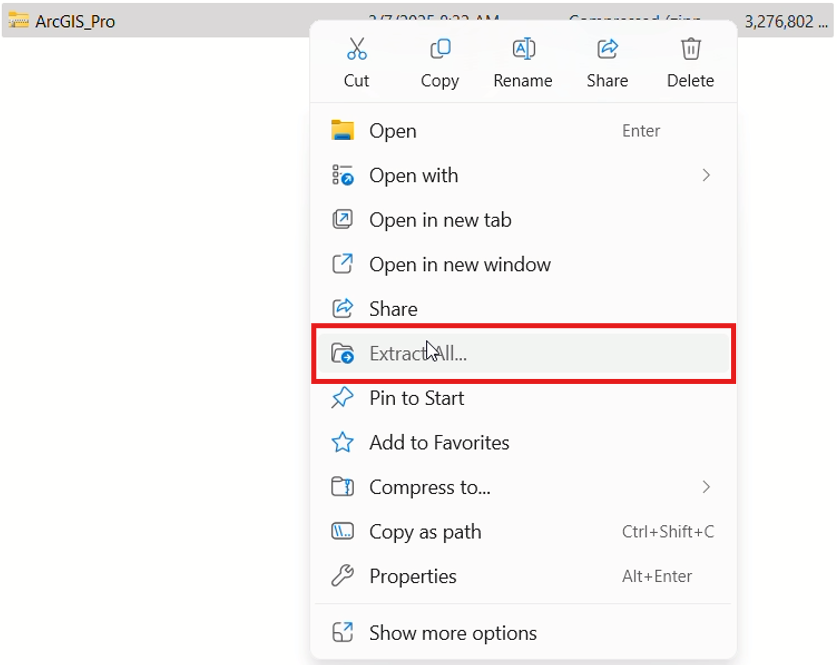
Fig. 1. Extracting files

Fig. 2. Installation file in the extracted folder
Phase 2: Program Installation
-
In the setup wizard, select the destination folder (or leave the default) and click Next (see Fig. 3).
-
Wait for the files to be prepared and click Close (see Fig. 4).
-
When the main installation phase opens (see Fig. 5), click Next twice.
-
Accept the terms (I accept the master agreement) and click Next.
-
Choose whether the program is for all computer users (Anyone who uses this computer) or only for you, then click Next.
-
Click Install and wait a few minutes for the installation to complete.
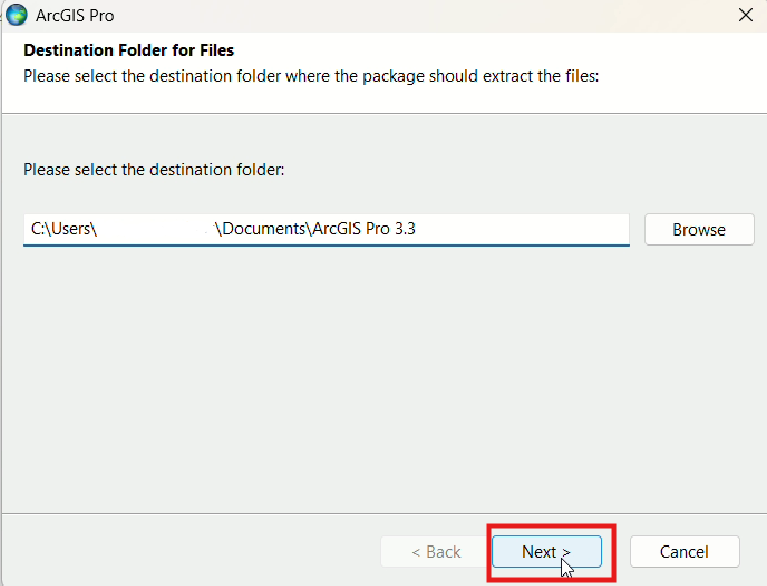
Fig. 3. Installation destination window
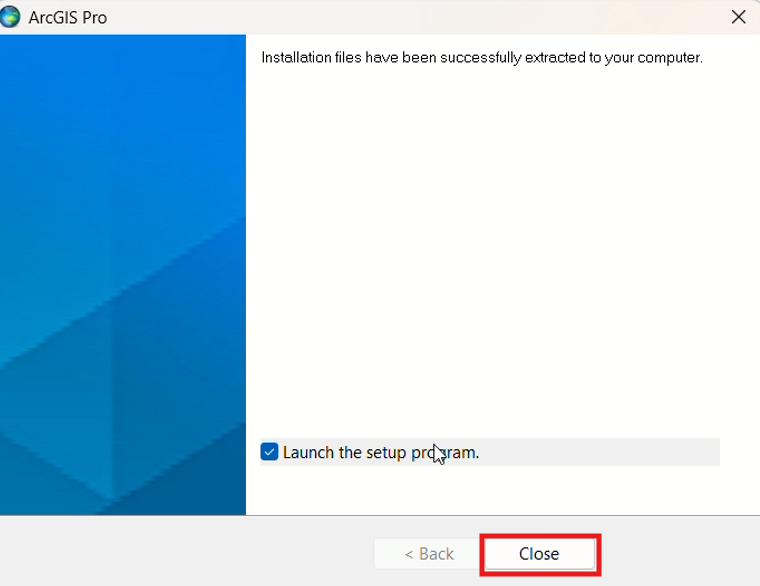
Fig. 4. Preparation completion window
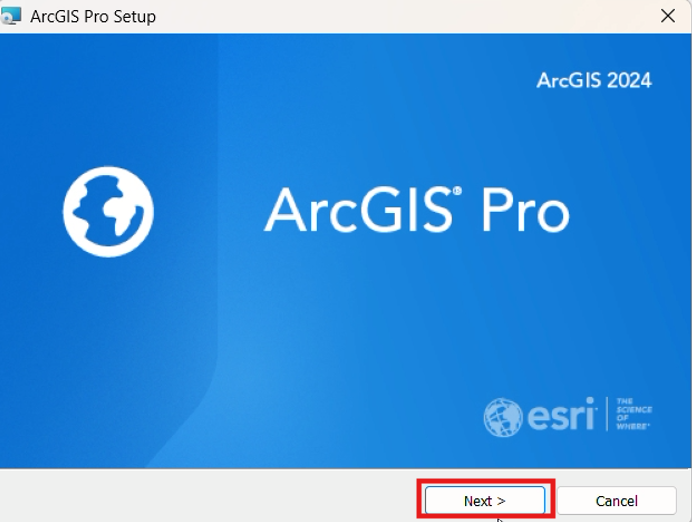
Fig. 5. Main installation stage
Phase 3: License Activation
-
Open the program and click Configure Licensing (see Fig. 6).
-
For the license type, select Single Use License and click Authorize (see Fig. 7).
-
Select the option "I have received an authorization file..." and click the Browse button to locate the .prvc file in your extracted folder (see Fig. 8 and 9).
-
Click Next twice, fill in your organization and professional details, and continue by clicking Next.
-
Wait for the authorization confirmation and click Finish.
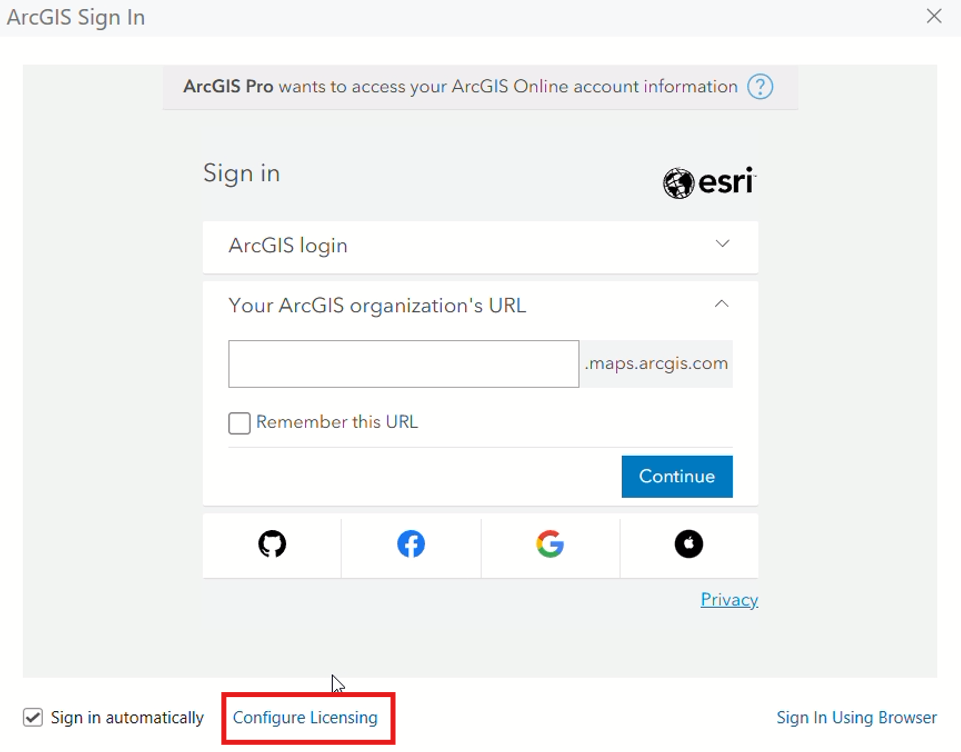
Fig. 6. Licensing configuration button
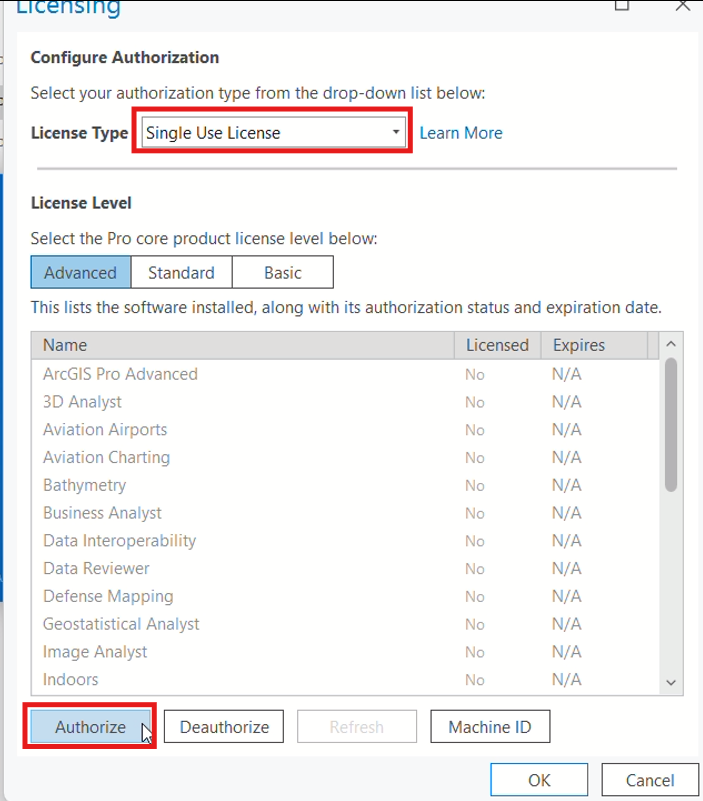
Fig. 7. Selecting "Single Use License"
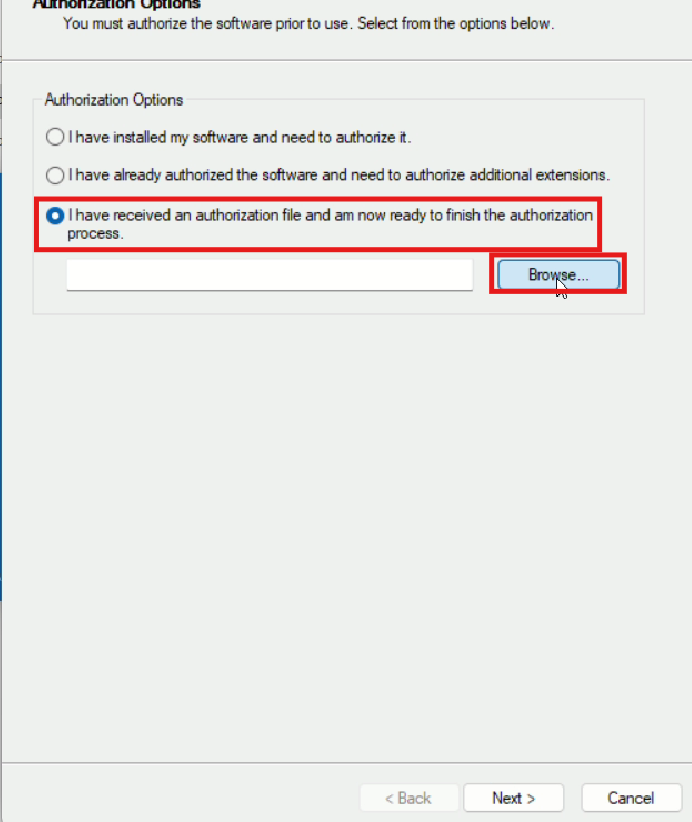
Fig. 8. Authorization file selection window

Fig. 9. Selecting the PRVC file from the folder
Phase 4: Getting Started
Once all steps are completed, the program will be ready for use (see Fig. 10). You can now create new projects or open existing ones.
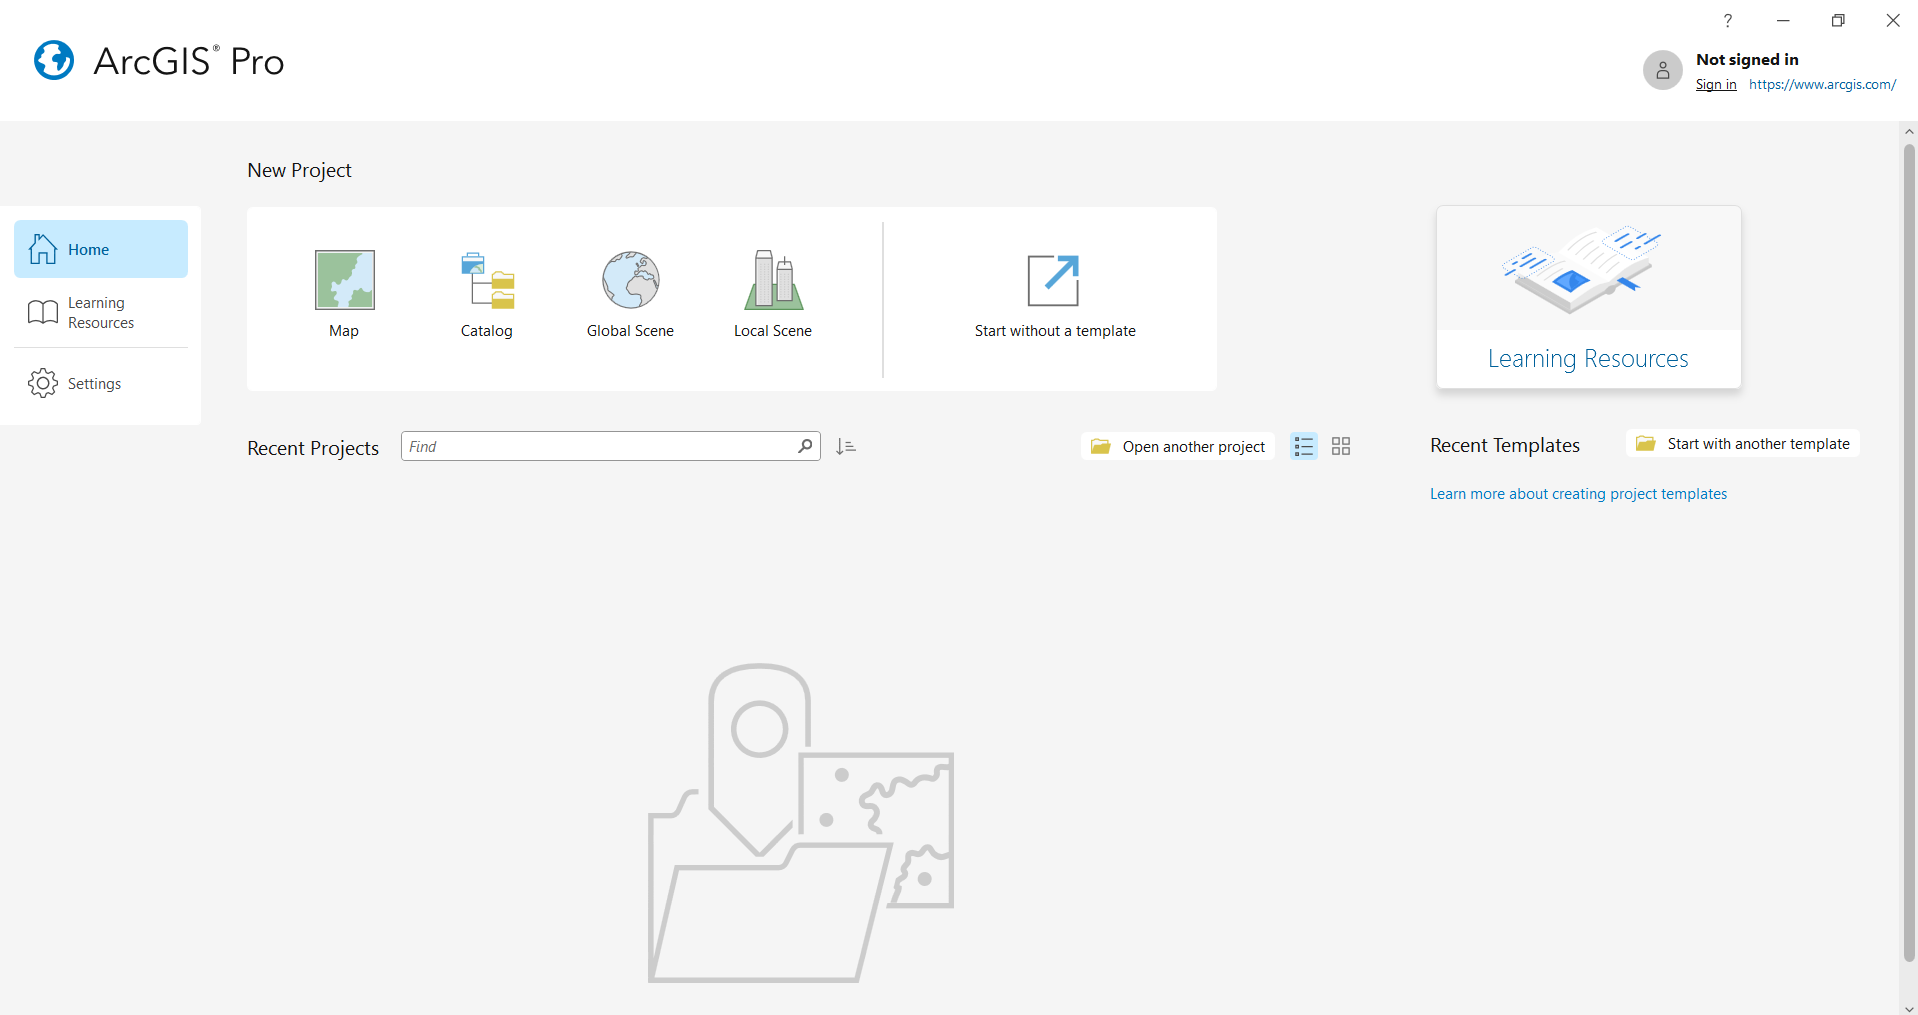
Fig. 10. Successfully prepared ArcGIS Pro program