How to Record a Meeting in Microsoft Teams?
If you want to save a video recording of a meeting or lecture for later viewing, you can use the recording feature. The recording will be automatically saved in the cloud.
Step 1: Start Recording
-
In the meeting control bar, click the More icon (three dots).
-
Hover over the Record and transcribe option.
-
Click the Start recording button (see Fig. 1).
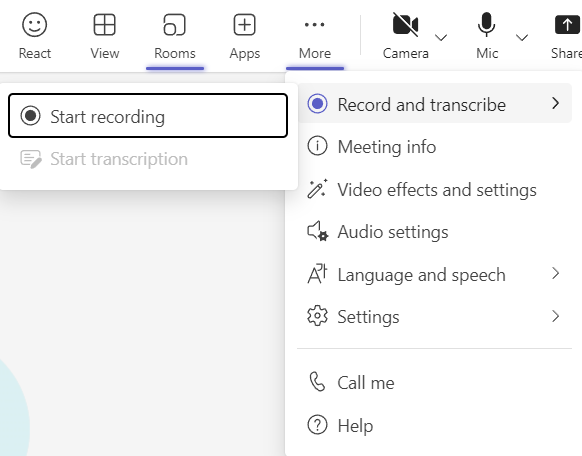
Fig. 1. Sequence to start recording via the "More" menu
Step 2: Stop Recording
-
Go to More -> Record and transcribe again.
-
Click Stop recording (see Fig. 2).
-
When the confirmation window appears, click Stop once more to finalize the process (see Fig. 3).
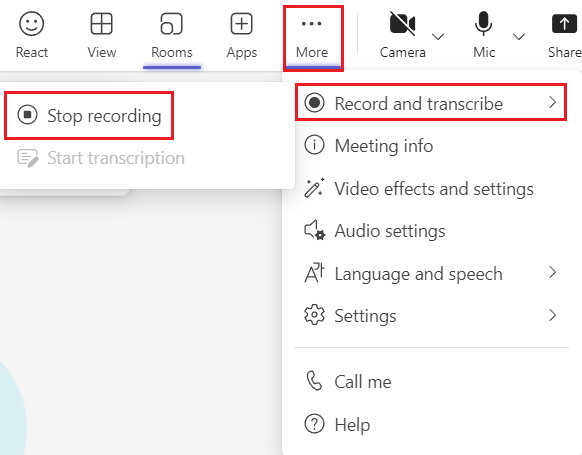
Fig. 2. Stop recording button
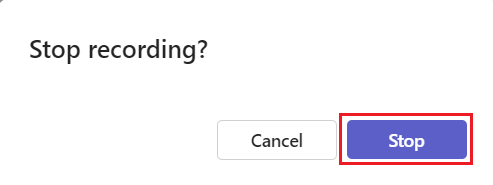
Fig. 3. "Stop recording?" confirmation window
💡 Important Information About Recordings
-
Where to find the recording? The recording is automatically saved in your OneDrive directory (under the "Recordings" folder). A link to the recording will also appear in the meeting Chat window.
-
Who can record? Only one recording can be active at a time. It can be started by the organizer or members of the same organization.
-
What is not included? The Whiteboard and shared notes are not included in the video recording.
-
When does recording end? Recording stops automatically when all participants leave the meeting or after 4 hours of continuous operation.
-
Privacy: All participants will receive an on-screen notification that the meeting is being recorded.