How to Share Your Screen?
If you want to show a presentation, document, or any other visual from your computer to the meeting participants, use the screen sharing feature.
Step 1: Start Screen Sharing
In the meeting control bar, locate and click the screen sharing icon (see Fig. 1).

Fig. 1. Screen sharing button in the control bar
Step 2: Choose What You Want to Show
-
Include sound: Make sure to turn this toggle on if you are sharing a video and want participants to hear the audio.
-
Screen: Participants will see everything you do on your computer.
-
Window: Allows you to share only one specific open application (e.g., just "Word").
-
Whiteboard: Designed for drawing or creating diagrams in real time.
-
Content from camera: Allows you to broadcast video directly from your camera as the main content.
-
PowerPoint / Excel Live (7): Special modes designed for convenient presentation or spreadsheet demonstrations and collaborative editing.
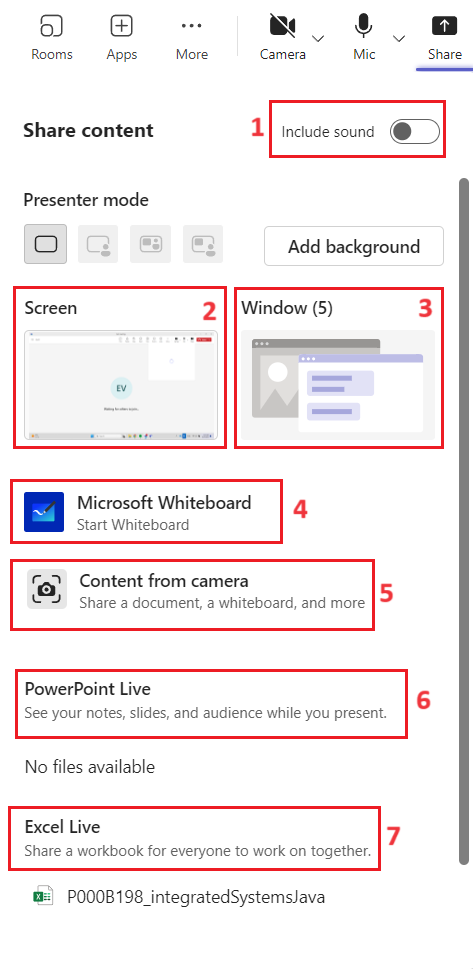
Fig. 2. Screen sharing options menu
Step 3: Verify That Sharing Is Active
Once sharing has successfully started, your screen (or the selected window) will be outlined by a red border (see Fig. 3). This confirms that other participants can see your view.
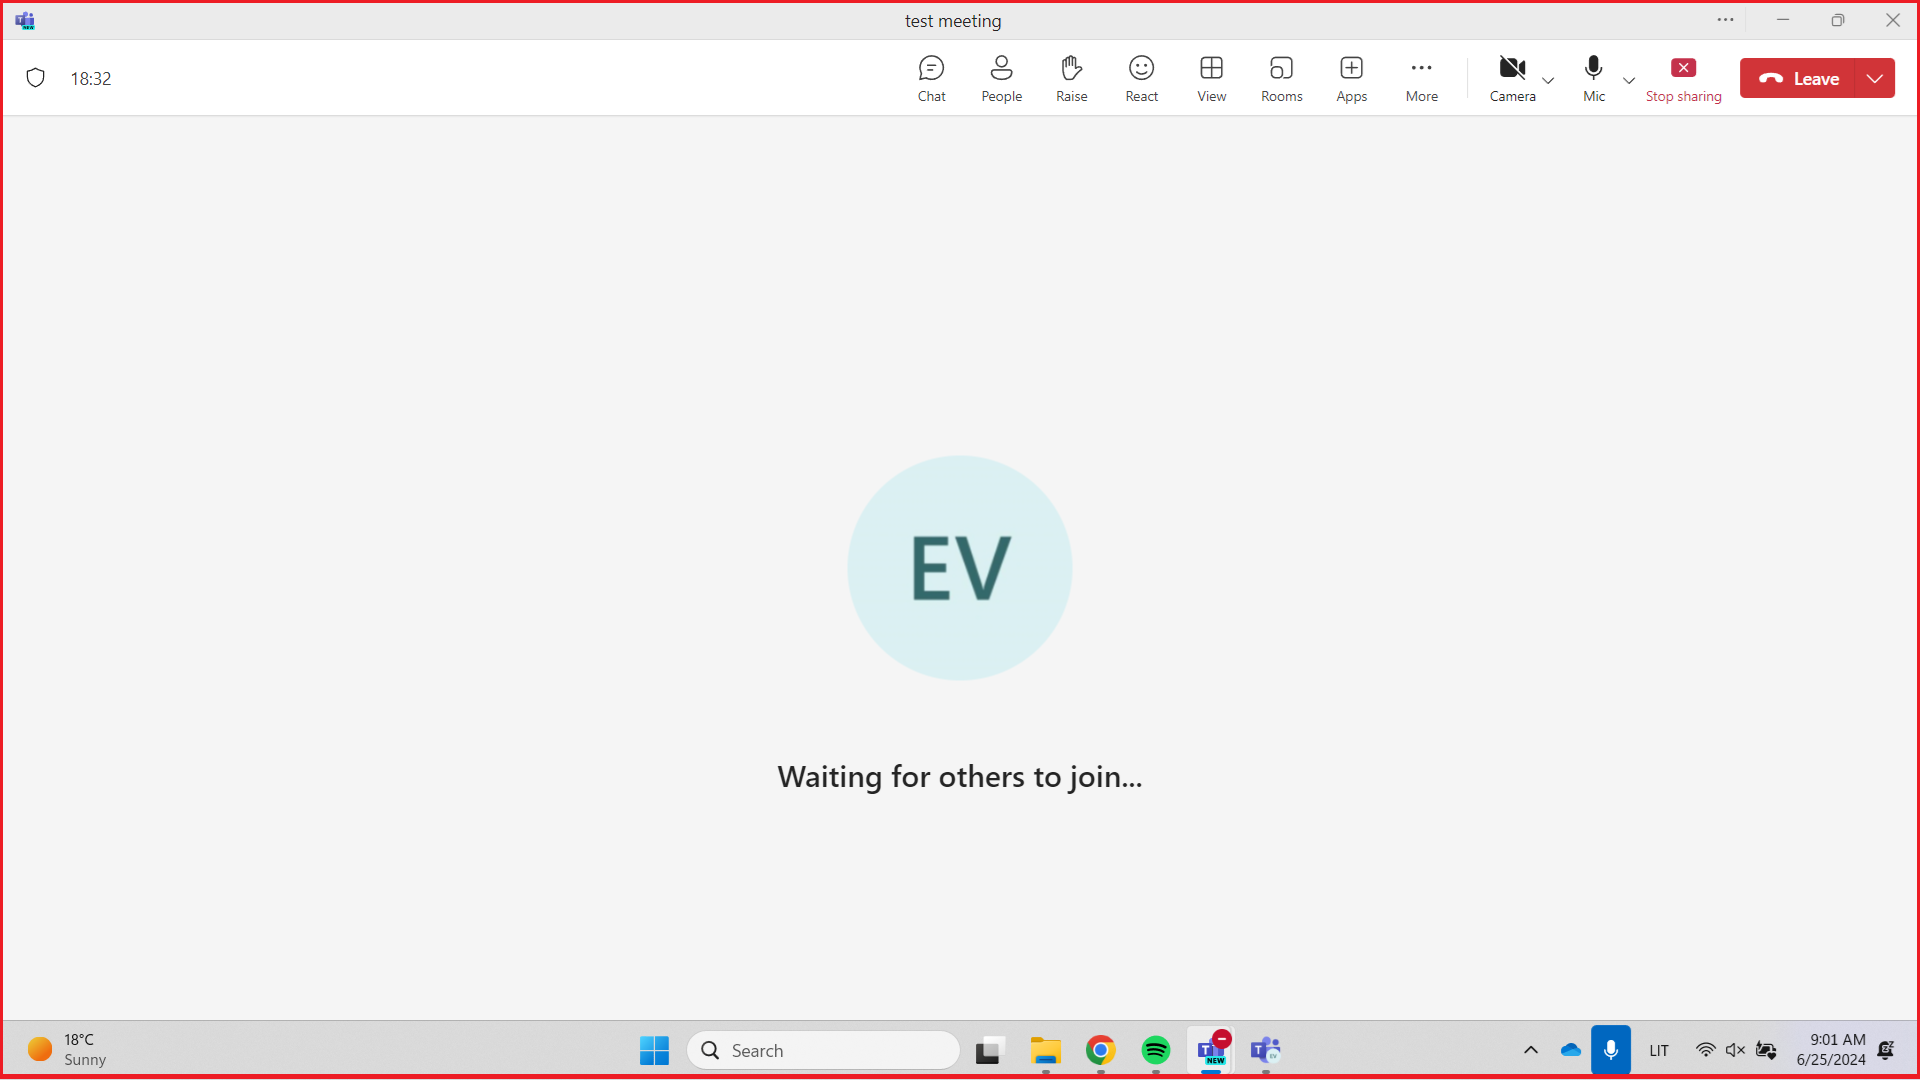
Fig. 3. Red border around the shared content
Step 4: Stop Sharing
When you are finished presenting, click the Stop sharing button in the control bar (see Fig. 4).

Fig. 4. Stop sharing button
💡 Security Tip
If you do not want participants to see your personal notifications or other open windows, we recommend choosing "Share a specific window" instead of showing your entire screen.